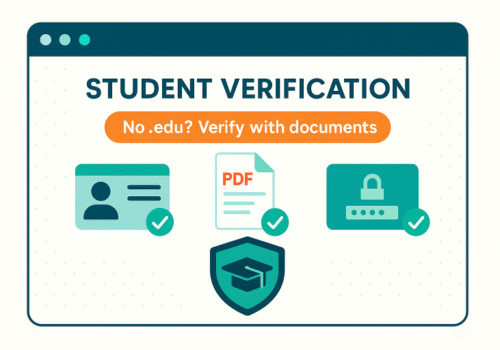
Not every school issues a .edu email, and plenty of students lose access between terms. That shouldn’t block you from student pricing. Most brands—and the verification partners they use—accept documents or a school portal login as proof. Here’s the cleanest way to pass verification without a .edu address.
TL;DR
-
Look for “Verify with documents” or “No student email?” on the brand’s student page.
-
Upload one or two of: student ID, enrollment letter, current class schedule, tuition receipt, or transcript.
-
If there’s no document option, ask support for the alternate verification link or a manual review.
-
Keep files clear, current, and matching your name to avoid rejections.
What proof usually works
You typically only need one of these; two is safer if your school uses unusual formatting.
-
Student ID card — must show your name, school name, and an active date or academic year.
-
Enrollment/registration letter — official letterhead, your name, program, and current term dates.
-
Current class schedule/timetable — exported from your portal; include your name and the term.
-
Tuition invoice/receipt — shows your name and the current billing period.
-
Transcript — unofficial is often fine if it lists the current term or “in progress” courses.
-
Acceptance letter + proof of enrollment — for pre-term students (e.g., deposit receipt or orientation confirmation).
Rule of three: your files should show Your Name + School Name + Current Dates.
The two paths that don’t require .edu
1) Document upload
-
Go to the brand’s official student page (type the domain manually; avoid ads and copycat sites).
-
Click Get Verified; when email check fails, choose Upload documents.
-
Submit one or two proofs as PDF or high-quality images.
-
Keep the confirmation email; you’ll need it if the discount doesn’t appear at checkout.
Timing: Automated systems approve within minutes; manual reviews can take 24–72 hours.
2) Portal sign-in (SSO)
Some verifiers let you sign in to your school portal instead of using a .edu address.
-
Choose Verify via school portal if offered.
-
Pick your institution from a list; you’ll be redirected to your familiar campus login.
-
After a successful sign-in, you’re sent back to the brand with the discount unlocked.
If your school isn’t listed, switch to document upload.
How to get the right document fast
-
Registrar or Student Services: Download an Enrollment Verification Letter—many portals generate it instantly.
-
Class schedule: In your portal, export Week/Term view to PDF so dates are obvious.
-
ID card: Photograph both sides under good lighting; crop tightly; avoid glare.
-
Transcript: Unofficial PDF is usually enough if it shows the current term.
File prep that prevents rejections
-
Prefer PDF; combine multi-page items into one file.
-
Make it readable (300-dpi scan or a sharp photo).
-
Redact sensitive numbers if you like, but keep your name, school, and dates visible.
-
Use clear names like
Ava_Smith_Enrollment_Winter2025.pdf. -
Ensure the name on the file matches the name on your account and payment method.
When the site only shows “enter .edu email”
Don’t abandon the discount—ask for the alternate path.
What to say in chat/email
Hi, I’m a current student at [School]. Our email domain isn’t .edu.
Could you send the link to verify with documents (ID/enrollment letter),
or add my school to your verification list?
Support can either trigger a manual review or provide a document-upload URL from their verification partner.
Common reasons for rejection (and quick fixes)
-
Out-of-date paperwork → Resubmit with a document issued this term or this month.
-
Blurry or cropped images → Re-scan; include edges, seals, and your full name.
-
Name mismatch → Update your account profile or include a secondary doc tying names together (e.g., school receipt showing your legal name).
-
Unlisted institution → Ask support how to add it, or which verifier accepts it; provide a link to your school’s site.
Edge cases you can still solve
-
Offer holders / not yet on campus — Many programs accept acceptance letter + deposit/registration proof.
-
Short courses & bootcamps — Ask for an official enrollment letter with dates; some brands limit eligibility to accredited institutions—check terms.
-
High school students — Some music, software, and travel offers accept secondary-school proof.
-
Homeschool — Look for brands that accept ISIC or formal documentation from your district/association plus current coursework.
Privacy & safety basics
-
Never share your school password with third parties outside a trusted SSO page.
-
Only upload documents on the brand’s verifier or the brand’s own portal—never via random DMs.
-
Prefer paying with a credit card for strong chargeback rights.
-
If something feels off, step back and confirm the student page on the brand’s main domain.
60-second checklist (before you submit)
-
I’m on the official brand site, not a look-alike.
-
I found the document upload or portal sign-in option.
-
My file shows name + school + current dates clearly.
-
The PDF is sharp and the name matches my account.
-
I saved the submission confirmation in case support needs it.
FAQ
Do I need multiple documents?
Usually one is enough; two can speed manual review if your school format is uncommon.
How long does manual review take?
Anywhere from minutes to 2–3 days, depending on volume.
Will I need to re-verify later?
Most brands request annual or per-term re-verification.
Can I use ISIC instead of school documents?
For some travel and culture partners, yes. For software/hardware, it depends on brand rules.
Suggested on-page SEO
-
Meta title: The No-Email Route: Prove Student Status with ID, Transcript, or Portal
-
Meta description: No .edu email? Verify your student status with documents or a school portal login. See which proofs work, how to prepare files, and how to pass manual review fast.